
CERES user guide
Perform the task in Quest
The demonstrator performs the planned action in Quest while CERES records the outward view, headset pose and hands.
Join the session
- Open the invitation from the capture director in Quest.
- Select
Enable camera, grant permission and choose the outward-facing camera. - Wait for pairing, camera and recorder checks to complete.
- Select
Join XR, allow hand tracking and hold both hands in front of the headset until their outlines appear. - Wait for the capture director to confirm
GOandREC ARMED.
Read the HUD
The Horizon task strip shows the surface identity, current task timing, cycle, task, repetition, cue and instructions. Its progress bar covers the complete run. Only actions valid for the current state are shown. During a task, use pause or resume only when agreed with the capture director. During a reset, Pass, Fail, Retry and Next appear when the task allows them.
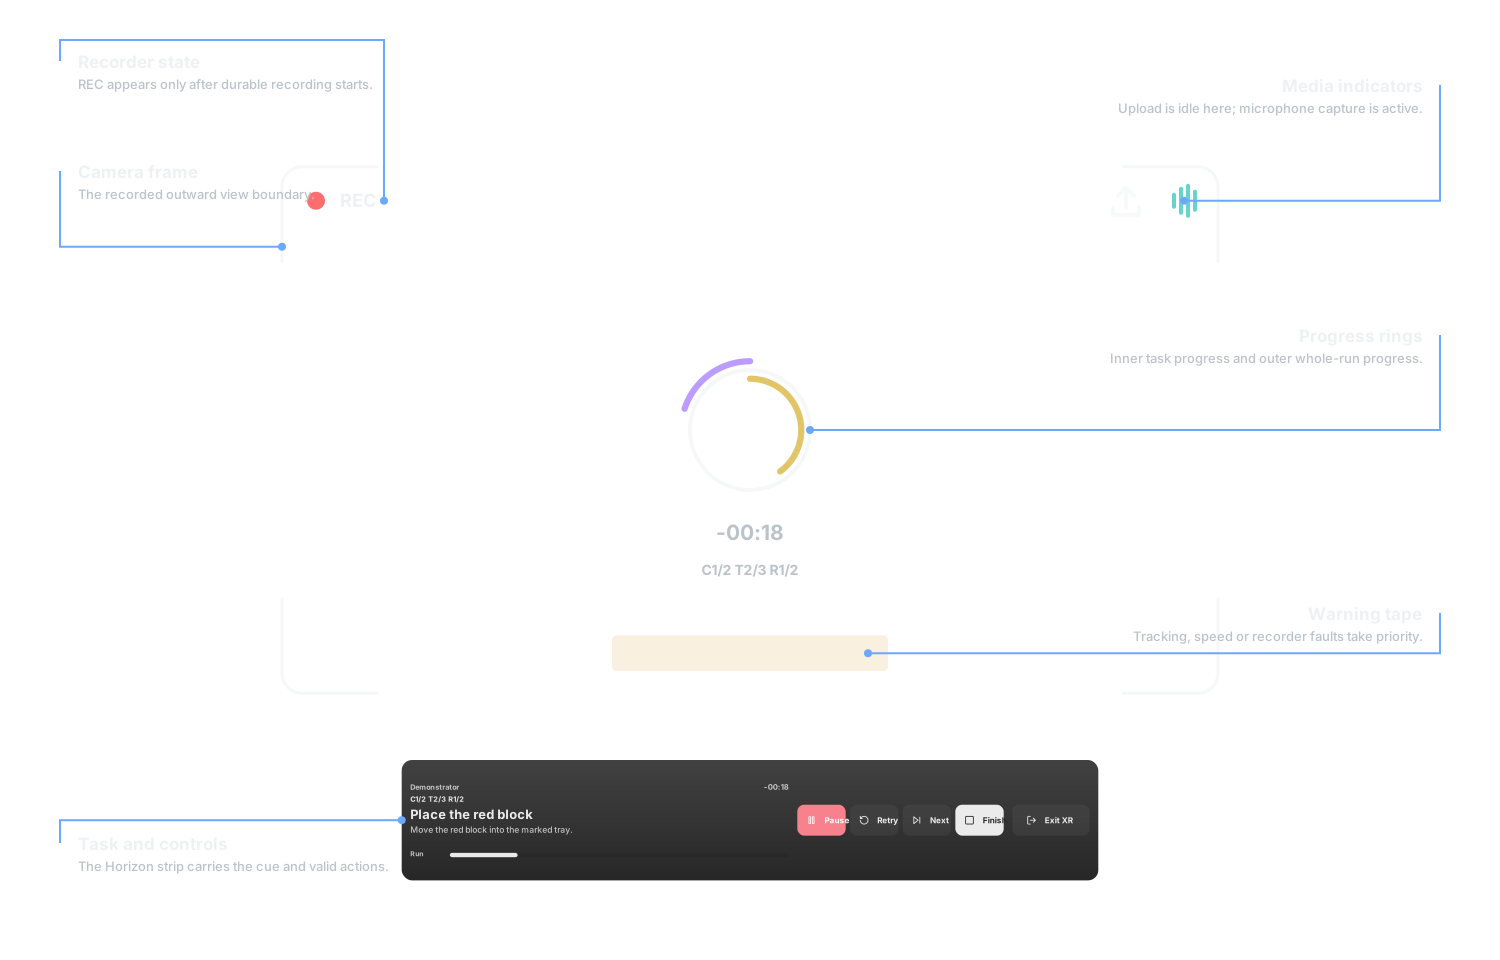
The camera frame carries the authoritative REC marker at the upper left and microphone state at the upper right. The adjacent upload icon remains idle during paired capture. The centre reticle has an inner task-progress ring and an outer whole-run ring. Timed work counts down, open work counts up and the final ten per cent of a timed task changes to red. A configured pause shows its remaining time in yellow. A warning tape takes priority when tracking, hand speed or the recorder needs attention.
Perform the take
- Move into the starting pose and check that the task text is the task you expect.
- Use the enabled start action only when the task strip says the run is waiting for the demonstrator.
- Begin the important movement only when
RECappears. - Work naturally while keeping hands visible where the task permits.
- Stop safely when the director pauses the take or when the scene changes.
- During reset, use
RETRYonly for a failed attempt. The previous attempt is replaced rather than recorded as a separate repetition.
If you leave XR, CERES pauses the capture. It does not delete or abandon it. Return to the run editor and select the visible Resume control before continuing.
Respond to hand warnings
LEFT HAND TOO FAST, RIGHT HAND TOO FAST or HANDS TOO FAST asks you to slow the affected hand when doing so does not change the task. Keep your hand in front of the headset, separate the hands and hold steady briefly if an outline freezes or disappears. Tell the capture director if tracking was absent during the important action.
For a task that genuinely requires fast movement, perform it naturally. The capture director will decide whether the recorded result needs a retry.
Use diagnostic hand views sparingly
OUTLINE, SIDE and trail OFF are the normal view. KEYPOINTS helps find missing or jittering joints. MESH shows fitted hand surfaces when assets are installed. COG follows each hand's centre path. These settings are shared with the monitor, so coordinate changes with the capture director.
Read the headset HUD guide for every control and voice command. If a readiness, camera or tracking state does not recover, use Recover a capture.